Saravanan's Corner: Blackberry Dev

Friday, 21 September 2018

JAVA - Observer Pattern

1.What is the Observer Pattern?

Observer is a behavioral design pattern. It specifies communication between objects: observable and observersAn observable is an object which notifies observers about the changes in its state.
For example, a news agency can notify channels when it receives news. Receiving news is what changes the state of the news agency, and it causes the channels to be notified.
Let’s see how we can implement it ourselves.
First, let’s define the NewsAgency class:
1
2
3
4
5
6
7
8
9
10
11
12
13
14
15
16
17
18
19
public class NewsAgency {
    private String news;
    private List<Channel> channels = new ArrayList<>();
    public void addObserver(Channel channel) {
        this.channels.add(channel);
    }
    public void removeObserver(Channel channel) {
        this.channels.remove(channel);
    }
    public void setNews(String news) {
        this.news = news;
        for (Channel channel : this.channels) {
            channel.update(this.news);
        }
    }
}
NewsAgency is an observable, and when news gets updated, the state of NewsAgencychanges. When the change happens, NewsAgency notifies the observers about this fact by calling their update() method.
To be able to do that, the observable object needs to keep references to the observers, and in our case, it’s the channels variable.
Let’s now see how the observer, the Channel class, can look like. It should have the update()method which is invoked when the state of NewsAgency changes:
1
2
3
4
5
6
7
8
public class NewsChannel implements Channel {
    private String news;
    @Override
    public void update(Object news) {
        this.setNews((String) news);
    }
}
The Channel interface has only one method:
1
2
3
public interface Channel {
    public void update(Object o);
}
Now, if we add an instance of NewsChannel to the list of observers, and change the state of NewsAgency, the instance of NewsChannel will be updated:
1
2
3
4
5
6
NewsAgency observable = new NewsAgency();
NewsChannel observer = new NewsChannel();
observable.addObserver(observer);
observable.setNews("news");
assertEquals(observer.getNews(), "news");
There’s a predefined Observer interface in Java core libraries, which makes implementing the observer pattern even simpler. Let’s look at it.

2. Implementation with Observer

The java.util.Observer interface defines the update() method, so there’s no need to define it ourselves as we did in the previous section.
Let’s see how we can use it in our implementation:
1
2
3
4
5
6
7
8
9
public class ONewsChannel implements Observer {
    private String news;
    @Override
    public void update(Observable o, Object news) {
        this.setNews((String) news);
    }
}
Here, the second argument comes from Observable as we’ll see below.
To define the observable, we need to extend Java’s Observable class:
1
2
3
4
5
6
7
8
9
public class ONewsAgency extends Observable {
    private String news;
    public void setNews(String news) {
        this.news = news;
        setChanged();
        notifyObservers(news);
    }
}
Note that we don’t need to call the observer’s update() method directly. We just call stateChanged() and notifyObservers(), and the Observable class is doing the rest for us.
Also, it contains a list of observers and exposes methods to maintain that list – addObserver()and deleteObserver().
To test the result, we just need to add the observer to this list and to set the news:
1
2
3
4
5
6
ONewsAgency observable = new ONewsAgency();
ONewsChannel observer = new ONewsChannel();
observable.addObserver(observer);
observable.setNews("news");
assertEquals(observer.getNews(), "news");
Observer interface isn’t perfect and is deprecated since Java 9. One of its cons is that Observable isn’t an interface but a class, that’s why subclasses can’t be used as observables.
Also, a developer could override some of the Observable‘s synchronized methods and disrupt their thread-safety.
Let’s look at the ProperyChangeListener interface, which is recommended instead of using Observer.

3. Implementation with PropertyChangeListener

In this implementation, an observable must keep a reference to the PropertyChangeSupport instance. It helps to send the notifications to observers when a property of the class is changed.
Let’s define the observable:
1
2
3
4
5
6
7
8
9
10
11
12
13
14
15
16
17
18
19
20
21
22
public class PCLNewsAgency {
    private String news;
    private PropertyChangeSupport support;
    public PCLNewsAgency() {
        support = new PropertyChangeSupport(this);
    }
    public void addPropertyChangeListener(PropertyChangeListener pcl) {
        support.addPropertyChangeListener(pcl);
    }
    public void removePropertyChangeListener(PropertyChangeListener pcl) {
        support.removePropertyChangeListener(pcl);
    }
    public void setNews(String value) {
        support.firePropertyChange("news", this.news, value);
        this.news = value;
    }
}
Using this support, we can add and remove observers, and notify them when the state of the observable changes:
1
support.firePropertyChange("news", this.news, value);
Here, the first argument is the name of the observed property. The second and the third arguments are its old and new value accordingly.
Observers should implement PropertyChangeListener:
1
2
3
4
5
6
7
8
public class PCLNewsChannel implements PropertyChangeListener {
    private String news;
    public void propertyChange(PropertyChangeEvent evt) {
        this.setNews((String) evt.getNewValue());
    }
}
Due to the PropertyChangeSupport class which is doing the wiring for us, we can restore the new property value from the event.
Let’s test the implementation to make sure that it also works:
1
2
3
4
5
6
7
PCLNewsAgency observable = new PCLNewsAgency();
PCLNewsChannel observer = new PCLNewsChannel();
observable.addPropertyChangeListener(observer);
observable.setNews("news");
assertEquals(observer.getNews(), "news");

4. Conclusion

In this article, we’ve examined two ways to implement the Observer design pattern in Java, with the PropertyChangeListener approach being preferred.

Useful link: 
The source code for the article is available over on GitHub.

Thursday, 20 September 2018

Node JS


Node.js is a server-side platform built on Google Chrome's JavaScript Engine (V8 Engine). 

- Node.js is an open source, cross-platform runtime environment for developing server-side and networking applications. 

- Node.js applications are written in JavaScript, and can be run within the Node.js runtime on OS X, Microsoft Windows, and Linux.

Download Node.js archive
Download latest version of Node.js installable archive file from Node.js Download

Installation on Windows

Use the MSI file and follow the prompts to install the Node.js. By default, the installer uses the Node.js distribution in C:\Program Files\nodejs. The installer should set the C:\Program Files\nodejs\bin directory in window's PATH environment variable. Restart any open command prompts for the change to take effect.

Verify installation: Executing a File

Create a js file named main.js on your machine (Windows or Linux) having the following code.
/* Hello, World! program in node.js */
console.log("Hello, World!")
Now execute main.js file using Node.js interpreter to see the result:
$ node main.js
If everything is fine with your installation, this should produce the following result:
Hello, World!

Creating Node.js Application

Step 1 - Import Required Module

We use the require directive to load the http module and store the returned HTTP instance into an http variable as follows −
var http = require("http");

Step 2 - Create Server

We use the created http instance and call http.createServer() method to create a server instance and then we bind it at port 8081 using the listenmethod associated with the server instance. Pass it a function with parameters request and response. Write the sample implementation to always return "Hello World".
http.createServer(function (request, response) {
   // Send the HTTP header 
   // HTTP Status: 200 : OK
   // Content Type: text/plain
   response.writeHead(200, {'Content-Type': 'text/plain'});
   
   // Send the response body as "Hello World"
   response.end('Hello World\n');
}).listen(8081);

// Console will print the message
console.log('Server running at http://127.0.0.1:8081/');
The above code is enough to create an HTTP server which listens, i.e., waits for a request over 8081 port on the local machine.

Step 3 - Testing Request & Response

Let's put step 1 and 2 together in a file called main.js and start our HTTP server as shown below −
var http = require("http");

http.createServer(function (request, response) {

   // Send the HTTP header 
   // HTTP Status: 200 : OK
   // Content Type: text/plain
   response.writeHead(200, {'Content-Type': 'text/plain'});
   
   // Send the response body as "Hello World"
   response.end('Hello World\n');
}).listen(8081);

// Console will print the message
console.log('Server running at http://127.0.0.1:8081/');
Now execute the main.js to start the server as follows −
$ node main.js
Verify the Output. Server has started.
Server running at http://127.0.0.1:8081/

Make a Request to the Node.js Server

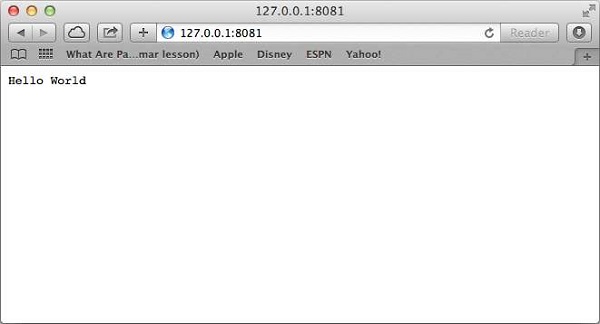
Open http://127.0.0.1:8081/ in any browser and observe the following result.
Node.js Sample
Congratulations, you have your first HTTP server up and running which is responding to all the HTTP requests at port 8081.


response.render -> eJs will compile and send to html...

const _ = require('lodash');
var validator = require('validator');
var user = require('os');
const note = require('./notes.js');
var option = process.argv[2];


if(option === 'list'){
console.log('your option is list all notes');
console.log(note.addnote());
} else if (option === 'read'){
console.log('your option is read note');
} else if (option === 'remove'){
console.log('your option is remove a note');
} else {
console.log('Invalid Option');
}

var i = 0;

do{
console.log('value' + i++);
}while(i<=10);


Agents-Standard agents, Advanced in Pega


Wednesday, 19 September 2018

Data tables in Pega


- Tables created from Pega is data tables that stores form of blob

- Every concrete class attached to a table. whenever create instance a class, get stored in the table and  mapped to the class, work object stored in database and mapped into the class.

- PZPVStream is a one and only the column that owl information stored in blob format.


- class and table where its mapping ?

Sysadmin-> database table -> you can see the mapping rule..

when you create a table, that should be mapped to work class. 
  • Pega will create class when you create a table,
  • Pega will create column when you create a property


Clipboard in Pega


- Clipboard is one of the debugging tool in Pega
- Clipboard is the snapshot of  server side memory
 -You can increase the size as much as you needed.
- Clipboard will fetch the data from database server and display to
- Don't maintain huge data that impact in performance
- Page is multi value property (container) Embedded property


- Employee (Page) -> name , no , etc (Properties)


Pages

Page is nothing but complete record of database 

4 types of pages available in clipboard
  • User Pages - For users, user requested session Only for session.
  • Data Pages - More life and scope in Pega
  • Linked Property Pages - linked concepts in Pega, like Pointers in C
  • System Pages - System level pages created by Pega for internal purpose.


  • Single values -
  • Value
  • Value List
  • Value Group - Value group will not have properties. only has values like array. address of 1, address of 2 etc.
  • Multi Valued
  • Page - Page will have properties insided. Page is nothing but complete record of database any kind of properties..Employee name, regno, salary, designation, adress etc..
  • Page List - Similar way n no of employees in a list called Page list
  • Page Group - index of string.  like, phone[1], Phone[2], Phone[3]
  •  PY Work page - Contains work object information.that are automatically commit in database. it is not bothe about other pages. no other page data committed in database. We put important information in PY Work Page. others are temporary values, temporary calculations, data transformation data's,
- All the related to case information will be here..case id, when modified, operator id and what are all the values entered..
- Page will only important information that are stored in database, no temporary or unimportant values to be stored.
- Temporary testing you can put the values here and test it by clicking edit icon here but this is not store onto the database by Pega.


Page list is subscript as Integer

Page Group

Page group subscript as String

if click one page group, Properties inside in it.
Value group will not be properties. only has values.


Value List: there is no properties under it..it's like an array 1,2,3 .. index is Integer and no child properties. address[1], address[2], etc


Page List: