Saravanan's Corner: Blackberry Dev

Thursday, 20 September 2018

Node JS


- Node.js is a server-side platform built on Google Chrome's JavaScript Engine (V8 Engine). 

- Node.js is an open source, cross-platform runtime environment for developing server-side and networking applications. 

- Node.js applications are written in JavaScript, and can be run within the Node.js runtime on OS X, Microsoft Windows, and Linux.

Download Node.js archive
Download latest version of Node.js installable archive file from Node.js Download

Installation on Windows

Use the MSI file and follow the prompts to install the Node.js. By default, the installer uses the Node.js distribution in C:\Program Files\nodejs. The installer should set the C:\Program Files\nodejs\bin directory in window's PATH environment variable. Restart any open command prompts for the change to take effect.

Verify installation: Executing a File

Create a js file named main.js on your machine (Windows or Linux) having the following code.
/* Hello, World! program in node.js */
console.log("Hello, World!")
Now execute main.js file using Node.js interpreter to see the result:
$ node main.js
If everything is fine with your installation, this should produce the following result:
Hello, World!

Creating Node.js Application

Step 1 - Import Required Module

We use the require directive to load the http module and store the returned HTTP instance into an http variable as follows −
var http = require("http");

Step 2 - Create Server

We use the created http instance and call http.createServer() method to create a server instance and then we bind it at port 8081 using the listenmethod associated with the server instance. Pass it a function with parameters request and response. Write the sample implementation to always return "Hello World".
http.createServer(function (request, response) {
   // Send the HTTP header 
   // HTTP Status: 200 : OK
   // Content Type: text/plain
   response.writeHead(200, {'Content-Type': 'text/plain'});
   
   // Send the response body as "Hello World"
   response.end('Hello World\n');
}).listen(8081);

// Console will print the message
console.log('Server running at http://127.0.0.1:8081/');
The above code is enough to create an HTTP server which listens, i.e., waits for a request over 8081 port on the local machine.

Step 3 - Testing Request & Response

Let's put step 1 and 2 together in a file called main.js and start our HTTP server as shown below −
var http = require("http");

http.createServer(function (request, response) {

   // Send the HTTP header 
   // HTTP Status: 200 : OK
   // Content Type: text/plain
   response.writeHead(200, {'Content-Type': 'text/plain'});
   
   // Send the response body as "Hello World"
   response.end('Hello World\n');
}).listen(8081);

// Console will print the message
console.log('Server running at http://127.0.0.1:8081/');
Now execute the main.js to start the server as follows −
$ node main.js
Verify the Output. Server has started.
Server running at http://127.0.0.1:8081/

Make a Request to the Node.js Server

Open http://127.0.0.1:8081/ in any browser and observe the following result.
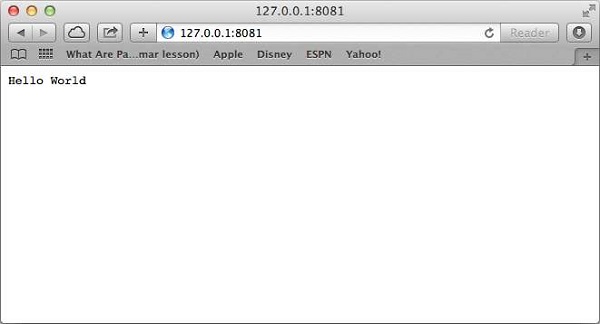
Node.js Sample
Congratulations, you have your first HTTP server up and running which is responding to all the HTTP requests at port 8081.


response.render -> eJs will compile and send to html...

const _ = require('lodash');
var validator = require('validator');
var user = require('os');
const note = require('./notes.js');
var option = process.argv[2];


if(option === 'list'){
console.log('your option is list all notes');
console.log(note.addnote());
} else if (option === 'read'){
console.log('your option is read note');
} else if (option === 'remove'){
console.log('your option is remove a note');
} else {
console.log('Invalid Option');
}

var i = 0;

do{
console.log('value' + i++);
}while(i<=10);


Agents-Standard agents, Advanced in Pega


Wednesday, 19 September 2018

Data tables in Pega


- Tables created from Pega is data tables that stores form of blob

- Every concrete class attached to a table. whenever create instance a class, get stored in the table and  mapped to the class, work object stored in database and mapped into the class.

- PZPVStream is a one and only the column that owl information stored in blob format.


- class and table where its mapping ?

Sysadmin-> database table -> you can see the mapping rule..

when you create a table, that should be mapped to work class. 
  • Pega will create class when you create a table,
  • Pega will create column when you create a property


Clipboard in Pega


- Clipboard is one of the debugging tool in Pega
- Clipboard is the snapshot of  server side memory
 -You can increase the size as much as you needed.
- Clipboard will fetch the data from database server and display to
- Don't maintain huge data that impact in performance
- Page is multi value property (container) Embedded property


- Employee (Page) -> name , no , etc (Properties)


Pages

Page is nothing but complete record of database 

4 types of pages available in clipboard
  • User Pages - For users, user requested session Only for session.
  • Data Pages - More life and scope in Pega
  • Linked Property Pages - linked concepts in Pega, like Pointers in C
  • System Pages - System level pages created by Pega for internal purpose.


  • Single values -
  • Value
  • Value List
  • Value Group - Value group will not have properties. only has values like array. address of 1, address of 2 etc.
  • Multi Valued
  • Page - Page will have properties insided. Page is nothing but complete record of database any kind of properties..Employee name, regno, salary, designation, adress etc..
  • Page List - Similar way n no of employees in a list called Page list
  • Page Group - index of string.  like, phone[1], Phone[2], Phone[3]
  •  PY Work page - Contains work object information.that are automatically commit in database. it is not bothe about other pages. no other page data committed in database. We put important information in PY Work Page. others are temporary values, temporary calculations, data transformation data's,
- All the related to case information will be here..case id, when modified, operator id and what are all the values entered..
- Page will only important information that are stored in database, no temporary or unimportant values to be stored.
- Temporary testing you can put the values here and test it by clicking edit icon here but this is not store onto the database by Pega.


Page list is subscript as Integer

Page Group

Page group subscript as String

if click one page group, Properties inside in it.
Value group will not be properties. only has values.


Value List: there is no properties under it..it's like an array 1,2,3 .. index is Integer and no child properties. address[1], address[2], etc


Page List:


Monday, 17 September 2018

Data class and Work class in Pega


Classes in Pega

  • Base Class, Work Class,  Data class, Int Class..etc

Work class


If you want the class to perform some work or some case, then you will need to directly inherit the "work-" class as a parent. This makes the class you are creating a "work Class". It's job to be instantiated as a work object or a Case Object to contain data related to work it is doing.
  • Work class - Something inheriting from Work - class of Pega
  • Work class should contain all business rule (Workflows, Section, Flow action, Decision, Validation)
  • Purpose of the work class is creating business rules and Instantiating a case.
  • Work classes are very specific for your application.
  • Work classes are direct inheritance or pattern inheritance


Data class


If you want the class to represent a Data Model, create a class that directly inherit the "Data-" class as a parent. so this becomes a "Data Class".  It's job to be a data model for whatever data you want to represent in PRPC. Usually, a Data Class is not Instantiated, and it is used more as a template in the Work Class for containing data that is pertinent to work to be resolved.
  • Data classes complete separate data component
  • Data classes nothing but dealing with data model which is nothing but data process
  • Static tables are created in a central repository to display their data's in front end.

Work class vs Data class

  • All work classes will reuse the data classes across components/application.
  • Basically, the difference is what they do. In summary, a Data Class is a template for Data Model, a Work Class represents a work type or case type for instantiating and resolving work.
  • Data classes normally contain properties, sections, decision rules, etc for reuse, Unless you have a very special requirement, flows should be defined at the work level for standard.
  • Data class - drop down data's, to show up some data to user to choose for transaction
  • Work class - Transactions - all case details get stored into work classes. for example, capturing order details, payment details in workflows etc...
  • Work class-create cases, and to store that case data we need table.

Can we create a Flow Rule under the Data Class?


  • If you want to use the same flow rule in different work classes, then we can create the flow in Data classes and use it in application work classes,
  • We can technically create a flow rule in data class, but typically flows are created in Work classes.

Pega Data Mapping

  • There is a rule called as DATA BASE - here you create a mapping between Pega and database.
  • - Goto under Records explorer -> SysAdmin-> Database -> Create mapping ->. instances of databases
  • - Database: if Oracle then give as usual JDB parameters


  • Or choose Configuration in preference. - make sure that the data store jar in the classpath and DB driver entry in the prconfig file.

  • Class and Table mapping: - Database table
  • Goto under Records explorer -> SysAdmin-> Click Database table
  • Pega will keep all data in a single row with blob format
  • Every class mapped to a data table
  • Every properties in a class mapped to a db column
  • PR PZ PV tables created in Pega with prefixes
  • PZ PV streams for Work Class tables
  • PR_Classname for Properties
  • PX created for activities, PY created for flows
  • PX and PZ are read-only you can't edit.
  • The default database is PgSql and PostGRESql installed
  • Class is connected to table and properties connected to columns in the table
  • PX and PZ work stream of Work classes table contain n no of properties

Data Table Creation in Pega:  (Data class + Table+ Properties + Column)

  • Data Explore -> add data type (data table) -> create new -> member details is name of data type
  • Advance -> choose org or implementation layer? -> applolo_data : Org data, applolo_ortho_care : implementation data. choose implementation data class and create.


Member Table Creation :

  • Until unless you creating properties table column will not be created. Property names & column names are same and both will be created in same time.
  • This is not page...so go to data model tab - > define each column (each properties with type.)
  • Come to records tab -> this is where you are going to enter data to database. click on 'configure source' -> only entering to the first time. here you have define the mandatory primary and secondary key for the table. second time 'configure source' will not display and you will enter the data . ->  tick the check box field for Key. you can enter one row of data if you want..just do this and submit the changes.. defining key is mandatory.


  • Next time if you want to enter more data .. just click on 
  • Data explorer -> click on data link you created -> click add a record link and enter your data

  • Data class created?
    • Now you can the data class created in Application -> class explorer
    • See a word -DATA- which indicates data class 
  • Under data model -> Property -> you can see property created for your data model


  • Data created? You can see in Data explorer.


  • You can see your table in PG sql : PR_table name


Open your database using PGadmin

  • C:/PRPCPersonaledition/PGsql/pgadmin4/bin/PGadmin4.exe-> just click that you will see the data base. Server should up and running so you can connect with your db ...


Notes:
- Blob tables are less memory consumption. It can be created when the table using only by your application.
- RDB tables reused by multiple applications (read only) - need more memory each data store in each row.
-  Reporting you need RDB tables..Store procedure and Function we need to go with RDB
- upstream -> data flowing
- downstream -> data who consuming
- Exposed means tables dedicated to every columns..

Create application in Pega 7.2


Application types in Pega

  1. Application Profiler - for B.A. non technical persons, to build visio diagram.
  2. Application Accelerator - Developer
  3. Application express - Infront application for demo

Steps:
  • Choose - (reusable) framework and Implementation.
  • Give objective of the application
  • Give Organisation name: BOA (name of organization layer)
  • Give class name 'Leave'
  • Give various Data type names (table name) - new table 'leaveBal' 
  • Your choice where you want to build the table whether in (organization enterprise org layer -) framework layer or implementation layer

Review:

Organisation layer.
 - work class (business layer)
 - Data class (for all data tables)
 - Integration class

(..We didn't give division layer)

Framework layer
 - Work class (business layer)
 - Data class (for all data tables)
 - Integration class
 - Implementation layer
 - Work class (business layer)
 - Data class (for all data tables)
 - Integration class

User
 - Access group
 - Access Role (Admin, manager, user)
 - Work Groups (group emails hold all email in particular group)
 - Work Baskets

Complete the wizard, Create the application  - 4 users with passwords created for the application.

- The application will be loaded.
- You can view operator details by clicking the top right corner,
- You can can change profile details, update the password.
- You can open rules - your application built on Pega rule.

Cases -> Leave

Records (only data) -> Oraganisation -> Operator id
Records -> Security -> Access group
Records -> Application -> id
App (explorer)-> find your class, and Rules

BOA Timeoff Work - class and child as below,

  • BOA. - Organisation layer classes
  • BOA-Data - Organisation data class
  • BOA.FW. - framework layer classes
  • BOA-FW-Data - framework layer data classes
  • BOA-TimeOff - Implementation layer classes
  • BOA-TimeOff-Data - Implementation data layer classes

Data (explorer)-> LeaveBal (table you can see)

If you choose BOA.TimeOff-Work -> you will see below

Case (explorer) -> you can see various type of cases of your application

Define the stage first

A stage is a collection of business processes. Stages represent show where a case is at any time during its process

Lifecycle - from creation to resolution. for example, a purchase request case can have these stages in this

Sequences.
1. Request
2. Vendor addition
3. Quote
4. Approval
5. Procurement
6. Closes

Case -> lifecycle -> add stages -> group a flow

1. Apply leave (Leave application stage), You can give SLA (Service Level Agreement)
2. Approvals
3. Notification

You can alternate stage by Actions -> Configure alternate stages

1. Rejected Notification (when approval rejected)

Done

Pega -Basics

Pega Basics:


What is Class Group?


  • Class Group is a combination of one or more abstract class
OCBC-OCBCAuto-OCBCWork
OCBC- (Org Abstract Class)
OCBCAuto- (Div Abstract Class)
OCBCWork (Unit Level Concreate Class) Inheriting from Work-
You are been applied with Pattern inheritance

Types of inheritance in Pega:

There are 2 types of inheritance available.
  • Direct Inheritance
  • Pattern Inheritance
1. Direct Inheritance
A class can have one and only one parent which is called the direct parent.
Direct parent of the class can be chosen from the drop-down Parent class (Directed)

2. Pattern Inheritance
Pattern Inheritance on a class can be applied by selecting the checkbox Find by name first (Pattern)
When we select the checkbox, the class will be applied by pattern inheritance.
OCBC-OCBCAuto-OCBCWork applied with pattern inheritance. PRBC trades OCBC-OCBCAuto parents classes to OCBCWork.

Pattern Inheritance has multiple parents.

The class group will be automatically created when we create a new application.

3. How to create a new application in Pega7?

A new application can be created from the 'New application wizard'. when we create new application it creates below

4. Components.

1. Application
2. Operator IDs with default password 'rules'
3. Class group

Steps

  • Login PRPC with administrator@pega.com/install
  • Click on the top menu and choose the new application
  • Application name - DBS Insurance Operation
  • Build on application - PegaRules
  • Organization name: DBS
  • Click on Next
  • Business objective: enter objective of you
  • Skip case type and Datatypes
  - Now it created with below operators,
1. administrator (Developer login),
2. DBA (Developer login)
3. Manager
4. User

- with default password 'rules'.

- It creates 'DBS insurance Operations' application

- Login with Admin@rules/rules

- Once we log in, click on application explorer which displays the class group.

- DBS-DBSINSURU-Work


4. Design a screen to capture customers basic information
  • First name 
  • Last name 
  • Age
  • Gender
  • phone number
  • email
  • address
5. To create a webpage, follow below steps

  • Step 1. Identify and create all the required properties.
  • Step 2. Design UI by creating 'Section', drag and drop the above-created properties on the layouts of section
  • Step 3. Create a flow action, call the above-created section into this flow action.
  • Step 4. Create a workflow, call the above-created flow action into the flow by using an assignment sheet
  • Step 5. Create a work object for the above-created flow, save the flow and run it
Step 1  Creating properties
  • A property can create under data-model category
  • Right click on data model, create -> data model - > property
  • Enter label name -> press create and open button -> accept in the default and click on Save
  • Create other properties in a similer way..

Step 2. Design User Interface by creating section.
  •  The section can be created under user interface catagory
  •  Right click on class group -> user Interface -> section
  •  Section name & configuration : section label : capture customer details -> click create and open
  •  How to align this control in the layouts and how to add a header text to the layout:
  •  Click on the layout to select it and click on view properties icon
  •  Layout format: inline format double
  •  Select the check to display header and title
  •  Write title in the text box and then submit the popup
  •  Click on save so section will be created.

Step 3 Creating flow action:

  •  Flow action can be created under the process category.
  •  Classgroup -> process -> flow action
  •  Config: capturing the customer details -> create
  •  Select the section from the drop down and save.

Step 4 : Creating a workflow:
  • Flow call the above created flow action into the flow by using an assignment sheet
Step 5. Create a work object for the above created flow, save the flow and run it

6. Implementation


Step1. Creating Properties

 A property can create under the data-model category

  • Right click on data model, create -> data model - > property
  • Enter label name -> press create and open button -> accept in the deaful and click on Save
  • Create other properties in a similar way

Step 2. Design User Interface by creating section.

  • The section can be created under user interface category
  • Right click on class group -> user Interface -> section
  • Section name & configuration : section label : capture customer details -> click create and open
  • You can check how to align this control in the layouts and how to add a header text to the layout:  click on ..

Step 3 Creating flow action:

  • Flow action can be created under process category.
  • class group-> create -> Progress -> Flow Action
  • Give the name of flow action : capturing the customer details

Step4 : Double click on out bold connector on assignment shape , it open a popup


Step 5 : Creating work object as below

  • Go the process on above flow , select check box create a new work object and save
  • Run the flow from action drop down.

Done.